Young Scholars Academy

Where Children Develop a Love of Learning

  • Home
  • About Us – Our Mission
    • Our Child Care Team
    • Team Leaders
    • Team Member of the Month!
  • Resources
    • Parent Resources
    • Additional Benefits
  • Contact Us
    • Careers at YSA
 5815 Tutt Center Point - Colorado Springs, CO 80922
 (719) 522-9099
Check Availability
  • Events & Updates
  • Programs
    • Infant Program
    • Toddler Program
    • Preschool
    • Prekindergarten
    • Junior Kindergarten
  • School Age Programs
    • Before and After School Program
    • Summer Camp
  • Enrichment Programs
    • Curriculum Ideas For Home | Young Scholars Academy
    • Art Projects
    • American Sign Language
    • Music & Fitness
  • Testimonials
    • Our Kids Speak!

20 Seasonal Art Activities for Preschoolers at Home

October 25, 2024 by Young Scholars Academy Leave a Comment

Art Activities for Preschoolers

Art activities for preschoolers are a fantastic way to inspire creativity and encourage self-expression. At Young Scholars Academy, we believe that arts and crafts are more than just fun—they’re a powerful tool for developing fine motor skills, problem-solving abilities, and imagination.  

Whether creating a festive masterpiece for each season or simply exploring different textures and colors, these 20 seasonal art activities will bring joy and learning into your home. Get ready to make lasting memories with your little ones through creative projects tailored for every time of the year!  

Spring Art Activities: Open Ended Preschool Art Activities
Open Ended Preschool Art Activities

Spring is the ideal season to celebrate new beginnings and bright colors! These open ended preschool art activities engage your preschooler’s imagination while teaching them about nature and the changing seasons.   

1. Flower Stamping with Vegetables

Turn everyday vegetables into beautiful flower stamps! To start:   

  • Use vegetables like celery, bell peppers, or okra for different shapes.  
  • Dip them into child-safe paint.  
  • Press the veggie onto paper to create unique flower patterns.  

This creative craft introduces your child to making art using different textures and shapes. Once complete, hang their flower-filled masterpiece to brighten up any room!  

2. Butterfly Coffee Filter Craft  

This colorful butterfly craft is perfect for a rainy spring afternoon. Here’s what you’ll need:   

  • White coffee filters. 
  • Washable markers. 
  • Spray bottle filled with water.
  • Pipe cleaners.  

Begin by letting your child color the coffee filters with various patterns. Then, lightly spray the filters with water to create a beautiful watercolor effect. Once the filters are dry, pinch them in the center with a pipe cleaner to form the butterfly body and wings. This activity encourages children to explore color mixing and symmetry!   

3. Rainy Day Watercolor Painting  

Celebrate spring showers with a unique watercolor resist painting. Gather these materials: 

  • White crayons.  
  • Watercolor paints.  
  • Watercolor paper.

Encourage your child to draw raindrops or umbrella shapes using the white crayon. After that, let them paint over the drawing with watercolors. The crayon will refuse the paint, revealing a hidden masterpiece! Discuss how the wax repels water and encourage them to experiment with different shapes and designs. 

4. Egg Carton Caterpillar  

With this upcycled craft, you can transform old egg cartons into adorable caterpillars. Here’s what to do:  

  • Cut the egg carton lengthwise to create a caterpillar shape. 
  • Paint the individual cups in bright colors.  
  • Attach googly eyes and pipe cleaner antennae.  

Your child will love painting and decorating their caterpillar. This activity is also an excellent opportunity to talk about how caterpillars transform into butterflies, tying in a fun science lesson with their creative work.   

Preschool Art Activities for Summer
Summer is the season for sunshine, outdoor adventures, and vibrant art projects! Keep your peers entertained and engaged with these colorful preschool art activities for summer. 

5. Sand and Shell Mosaic  

Bring the beach inside with a sand and shell mosaic. To get started, gather:   

  • A shallow tray or cardboard base.  
  • Colored sand.  
  • A variety of small shells or pebbles. 
  • Glue.  

Spread glue over the surface of the tray or cardboard and let your child sprinkle different colors of sand to create a beachy background. Once the sand has dried, they can place shells and pebbles to form designs or patterns. This activity is excellent for enhancing fine motor skills while sparking creativity!   

6. Sun Prints Using Natural Elements  

Celebrate sunny days by making beautiful sun prints. You’ll need:   

  • Sun-sensitive paper.  
  • Leaves, flowers, or other natural items.  
  • A flat, sunny surface.  

Place the natural items on the sun-sensitive paper in direct sunlight for a few minutes. Once the desired exposure is reached, rinse the paper under cold water to reveal stunning silhouettes. This is a beautiful way to teach your child about light exposure and the natural world.  

7. Ice Painting Experiment  

Cool off with some creative ice painting. To begin, you’ll need:   

  • Ice cubes.  
  • Food coloring or washable paint.  
  • Paper.  

Freeze water with coloring in an ice cube tray with popsicle sticks. Once frozen, use the colorful ice cubes to paint on paper. As the ice melts, it leaves behind beautiful streaks of color. Discuss the melting process with your child and experiment with different techniques for blending colors.   

8. Paper Plate Fish Craft  

Make a splash with this underwater-themed craft. You’ll need:   

  • Paper plates.  
  • Child-safe paints or markers.  
  • Googly eyes.  
  • Craft scissors.  

Start by cutting a triangle from a paper plate to form the fish’s mouth, using the cutout piece as a tail. Let your child paint or color the fish in vibrant hues and add details like scales or bubbles. Attach a googly eye, and you have a friendly fish friend!   

Fall Art Activities

Autumn is the season of mild colors, cozy days, and plenty of inspiration for little artists. These fall-themed crafts are perfect for preschoolers to explore their creativity while embracing the beauty of the changing season. 

9. Leaf Rubbing Collage   

Celebrate the vibrant colors of fall leaves with a leaf-rubbing collage. Here’s what you need:   

  • A variety of fall leaves in unique shapes and sizes.  
  • Crayons in autumnal colors.  
  • White paper.  

Place the leaves under the paper and let your child use the side of a crayon to rub over the surface. As they color, the shapes of the leaves will emerge like magic! Encourage your child to layer different leaves and colors to create a beautiful seasonal collage. Once finished, discuss the various types of leaves and why they change colors during autumn.   

10. Pumpkin Seed Art  

Don’t throw away those seeds after carving your jack-o’-lanterns! Use them for an engaging art activity. Gather:   

  • Clean, dried pumpkin seeds.  
  • Non-toxic paint. 
  • Glue and construction paper. 

Let your child paint the pumpkin seeds in different colors, then use them to create patterns or pictures on construction paper, such as pumpkins, apples, or autumn trees. This activity is excellent for boosting fine motor skills and teaching children to repurpose natural materials.   

11. Handprint Turkey Painting  

Handprint turkeys are a classic fall craft that always stays in style! To make one, you’ll need:   

  • Non-toxic paint in fall colors.  
  • A large sheet of paper.  
  • Markers or crayons for details.  

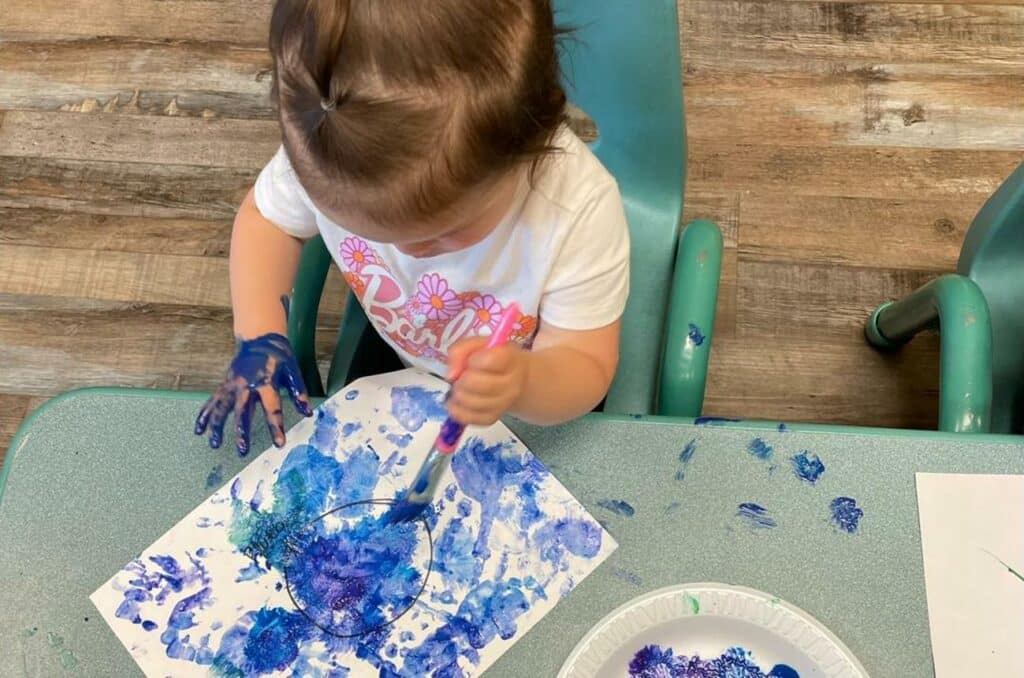
Paint your child’s hand in different colors, press it onto the paper, and watch as a turkey takes shape. Use markers or crayons to highlight details like feathers, beaks, and feet. Your child will love seeing their handprint turn into a festive bird, and it’s a beautiful keepsake to look back on year after year.

12. Corn Husk Dolls 

Create charming little dolls using dried corn husks. You’ll need:   

  • Dried corn husks (available at craft stores).  
  • Yarn or string.  
  • Scissors and markers for decorating.  

Soak the husks in water to make them flexible, then fold and tie them to form a doll shape. Use yarn for the arms, legs, and waist, and markers to draw on a face. This project is fun and an excellent opportunity to discuss how corn was used in traditional crafts. 

Preschool Art Activities for Winter
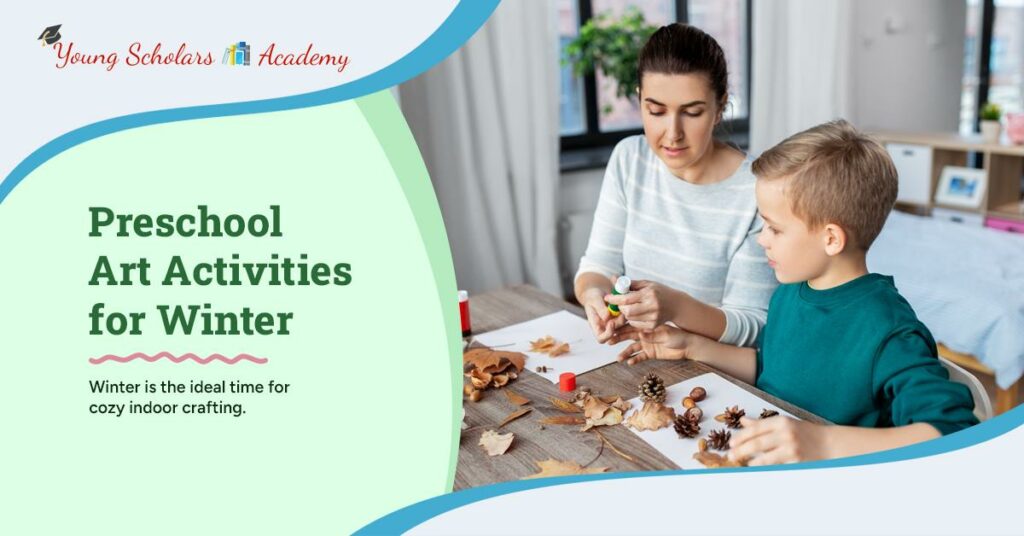
Preschool Art Activities for Winter

Winter is the ideal time for cozy indoor crafting. Keep your preschooler engaged and excited with these festive and creative preschool art activities for winter.   

13. Snowflake Salt Painting  

Bring the beauty of snowflakes indoors with a simple salt painting project. You’ll need:   

  • White glue.  
  • Table salt.  
  • Watercolor paints and brushes.  
  • Black or dark-colored construction paper.  

Start by having your child draw snowflake patterns on the paper using glue. While the glue is still wet, sprinkle salt generously over the lines. Once dry, your child can gently paint over the salt lines with watercolors, watching as the colors spread and blend beautifully. This activity results in stunning art and helps develop fine motor skills!

14. Pine Cone Ornaments  

Turn an afternoon nature walk into a crafting opportunity by collecting pine cones for homemade ornaments. To get started, gather:   

  • Clean, dry pine cones.  
  • Acrylic paint or glitter glue.  
  • Ribbon or yarn for hanging.  

Have your child paint the pine cones in festive colors or add glitter for some sparkle. Once dry, tie a ribbon around the top for hanging. These ornaments are perfect for decorating the tree or giving as holiday gifts, and they also introduce children to using natural materials in art.   

15. Paper Snow Globes  

Create a winter wonderland scene with paper snow globes! Here’s what you’ll need:   

  • White and colored construction paper.  
  • Scissors and glue.  
  • Markers and crayons.  
  • Clear plastic plates.    

Cut out a snow globe shape from construction paper and let your child draw a winter scene inside, such as snowmen, evergreen trees, or a cozy cabin. Attach a clear plastic plate over the drawing to create the “glass” of the snow globe. This activity is great for storytelling and encouraging your child to imagine their snowy world.   

16. Mitten Lacing Craft

Develop fine motor skills while creating adorable mitten crafts. Gather:   

  • Construction paper or felt in mitten shapes.  
  • Hole punch.  
  • Yarn or ribbon for lacing.  

Punch holes around the edges of the mitten cutout. Give your child a piece of yarn or ribbon and let them lace through the holes. This activity improves their hand-eye coordination and concentration while creating a cute winter decoration!   

Holiday-Themed Art Activities

The holiday season is filled with happiness, laughter, and plenty of opportunities for creative crafts. Engage your preschooler with these festive art activities that celebrate the magic of various holidays throughout the year.   

17. Valentine’s Day Heart Suncatcher  

Create beautiful heart suncatchers that will brighten up any window. You’ll need:   

  • Wax paper.  
  • Crayons (shaved into small bits).  
  • Iron and a towel. 
  • Heart-shaped template.  

Start by sprinkling crayon shavings onto a piece of wax paper. Place another wax paper on top, then carefully iron over the towel-covered paper to melt the shavings. Once cooled, cut out heart shapes using the template. Hang these colorful hearts in a window, and watch the light shine through! It’s a great activity to practice cutting skills and learn about color blending.   

18. Easter Bunny Paper Plate Mask  

Hop into Easter with a fun bunny mask project! Gather these materials:   

  • Paper plates.  
  • Child-safe paints or markers.  
  • Craft stick or elastic band.  
  • Cotton balls.    

Let your child color the paper plate to create a bunny face. Glue on cotton balls for a fluffy texture, and attach a craft stick at the bottom or an elastic band on the sides to create a wearable mask. This craft is perfect for pretend play and playfully celebrating the holiday.   

19. Halloween Paper Bag Puppets

Transform a simple paper bag into a spooky or silly Halloween puppet. Here’s what you’ll need:   

  • Brown or white paper bags.  
  • Construction paper in various colors.  
  • Glue, markers, and googly eyes.  

Encourage your child to use the construction paper and markers to create features like a ghost’s face, a pumpkin’s grin, or a witch’s hat. Glue the features onto the paper bag, and your puppet is ready to perform! This activity is terrific for storytelling and imaginative play. 

20. Christmas Tree Handprint Art  

Capture the holiday spirit with a personalized handprint Christmas tree. To get started:   

  • Green and brown paint.  
  • Large sheet of paper. 
  • Star stickers or small decorations.  

Paint your child’s hand in green and press it onto the paper to form a tree shape, layering the handprints as you go up. Add a brown paint trunk at the bottom and let them decorate their tree with star stickers, sequins, or drawings. It’s a festive keepsake that makes for a lovely holiday memory!   

Conclusion

Engaging in seasonal art activities with your preschooler is a wonderful way to nurture their creativity, explore the beauty of each season, and build lasting memories together. Whether it’s crafting a cozy mitten or a festive holiday decoration, these projects inspire your little artist and celebrate the joy of childhood. So gather your supplies, let your child’s imagination run wild, and enjoy these delightful art projects that perfectly capture the spirit of every season!   

Ready to create more fun-filled moments? Contact Young Scholars Academy today at our contact page or call us at (719)522-9099 for more ideas and educational resources!  
Filed Under: Activities, Art Projects, Preschool

10 Easy Preschool Crafts For Friendship Day: A Craft Guide

June 3, 2024 by Young Scholars Academy Leave a Comment

Preschool crafts for Friendship Day are an excellent way to celebrate the special bonds children create. At Young Scholars Academy, we believe in fostering these connections through creative activities that are both fun and educational.

This guide will share ten easy preschool crafts that inspire creativity and teach critical social-emotional skills. These crafts are designed to be simple, engaging, and perfect for young learners, helping them to express their appreciation and love for their friends.

1. Heartfelt Handprints: Preschool Crafts for Friendship

Handprint crafts are a heartfelt way for preschoolers to celebrate Friendship Day. These preschool crafts for friendship are simple, fun, and a wonderful way to create lasting memories. Here’s how you can help your little ones create meaningful handprint art.

Materials Needed


  • Non-toxic paint (various colors)

  • Large sheets of paper or canvas

  • Brushes or sponges

  • Markers or crayons

  • Wet wipes or a bowl of water for cleaning hands

Steps to Create Heartfelt Handprints

1. Preparation


  • Lay down papers or a plastic sheet to protect the work area.

  • Ensure all materials are within reach.

2. Creating Handprint Art


Paint the Hands:
Have each child choose a color and paint their hands with a brush or sponge. Encourage them to spread their fingers wide for a full handprint


Press on Paper:
Help the children press their painted hands onto the paper or canvas, leaving vibrant handprints.


Add Details:
Once the paint dries, write names and add decorative elements around the handprints with markers or crayons.

3. Design Variations


Handprint Heart:
Arrange two handprints to form the shape of a heart. This symbolizes the love and care between friends


Friendship Wreath:
Create a circle of handprints to form a friendship wreath. Each handprint can be a different color, representing diversity and unity.


Message in the Middle:
Leave space in the center of the handprints for a heartfelt message or quote about friendship.

Displaying the Crafts


Classroom Wall:
Display the handprint art on a classroom wall to create a beautiful and meaningful Friendship Day mural.


Gift for Friends:
Each child can create a handprint piece to give to a friend as a keepsake.


Take-Home Art:
Allow the children to take their creations home to share with their families.
Creating heartfelt handprint art is a joyful and educational activity that fosters friendship and creativity among preschoolers. It’s a perfect way to celebrate Friendship Day and create lasting memories.

2. Friendship Bracelets: Classic Friendship Crafts for Preschool

Making friendship bracelets is a timeless and enjoyable activity that helps preschoolers celebrate their friendships. These simple yet meaningful friendship crafts for preschool promote creativity and fine motor skills. Here’s how you can guide your preschoolers through creating these classic friendship crafts.

Materials Needed


  • Colorful yarn or embroidery floss

  • Beads (optional)

  • Safety scissors

  • Tape or clipboard to hold the thread

Steps to Create Friendship Bracelets

1. Preparation


  • Choose a variety of colorful yarns or embroidery floss.

  • Cut lengths of thread, about 12-18 inches long. For each bracelet, you will need three to four strands.

2. Setting Up


  • Tie a knot at one end of the strands and tape it to a table or secure it with a clipboard.

  • Spread out the strands to begin braiding.

3. Braiding the Bracelet


Simple Braid:
Divide the strands into three sections. Show the children how to cross the outer strands over the middle strand in an alternating pattern.


Adding Beads:
For a more decorative bracelet, add beads by threading them onto the strands as they braid. This enhances fine motor skills and adds a personal touch to each bracelet.


Friendship Knots:
Teach the children to tie simple knots at intervals along the bracelet for a textured look.

4. Finishing the Bracelet


  • Tie a secure knot at the end once the braid is long enough to fit around the wrist.

  • Trim any excess thread, leaving enough to tie the bracelet onto a friend’s wrist.

Ways to Exchange Bracelets


Friendship Circle:
Have the children sit in a circle and exchange bracelets with the person next to them.


Friendship Ceremony:
Create a special moment where each child presents their handmade bracelet to a friend, emphasizing the significance of their bond.
Crafting friendship bracelets is a delightful and meaningful activity that celebrates friendship while helping preschoolers develop essential skills. It’s a perfect way to make Friendship Day unique and memorable.

3. Buddy Bookmarks: Fun Friendship Arts and Crafts for Preschool

Making buddy bookmarks is a delightful activity that encourages preschoolers to celebrate their friendships while fostering creativity and fine motor skills. These personalized friendship arts and crafts for preschools are great gifts and serve as a reminder of their special bonds. Here’s a step-by-step guide to creating fun and easy buddy bookmarks.

Materials Needed


  • Colorful cardstock or construction paper

  • Markers, crayons, or colored pencils

  • Stickers, glitter, and other decorative items

  • Safety scissors

  • Glue sticks

  • Hole punch

  • Yarn or ribbon

preschool crafts for friendship

Steps to Create Buddy Bookmarks

1. Preparation


  • Cut the cardstock or construction paper into bookmark-sized rectangles, approximately 2 inches by 6 inches.

  • Gather all decorative materials and ensure each child has a workspace.

2. Decorating the Bookmarks


Personalize with Names:
Have each child write their name and their buddy’s name on the bookmark using markers or crayons.


Add Decorations:
Encourage the children to decorate their bookmarks with stickers, drawings, glitter, and other embellishments. They can draw pictures of their favorite activities together or symbols of friendship, such as hearts or smiley faces.

3. Adding a Tassel


  • Punch a hole at the top of the bookmark.

  • Cut a piece of yarn or ribbon about 6 inches long and thread it through the hole to create a tassel. This adds a fun and functional element to the bookmark.

Creating buddy bookmarks is a fun and meaningful way to celebrate Friendship Day, allowing preschoolers to create tangible reminders of their friendships.

4. Friendship Flowers

Friendship flowers are a beautiful and symbolic craft that helps preschoolers express their appreciation for friends. This activity is simple, engaging, and perfect for young children. Here’s how to create friendship flowers.

Materials Needed


  • Colored construction paper

  • Safety scissors

  • Glue sticks

  • Markers or crayons

  • Green pipe cleaners

  • Stickers and other decorative items

Steps to Create Friendship Flowers

Preparation


  • Cut out flower outlines from the construction paper. Each flower should have a circular center and multiple petals.

  • Cut out leaves from green construction paper.

2. Assembling the Flowers


Decorate the Petals:
Have the children write their friends’ names on the petals or draw pictures that represent their friendship. They can also decorate the petals with stickers and drawings.


Create the Stem:
Using glue, attach a green pipe cleaner to the back of the flower. This will be the stem of the flower.


Add Leaves:
Glue the green leaves to the pipe cleaner stem.

3. Creating a Bouquet


  • Have each child make multiple flowers to create a bouquet. This can be a collaborative effort where children exchange flowers to form a collective bouquet representing their friendships.

Friendship flowers are a charming and heartfelt craft that preschoolers will love, making Friendship Day special and memorable.

5. Friendship Rocks

Creating friendship rocks is a fun and meaningful activity that allows preschoolers to express their friendship creatively. These decorated rocks can be shared and displayed, making them a perfect craft for Friendship Day. Here’s a step-by-step guide to making friendship rocks.

Materials Needed


  • Smooth, flat rocks

  • Non-toxic acrylic paint

  • Paintbrushes

  • Markers

  • Mod Podge or clear sealant

  • Newspaper or plastic sheet (to protect the work area)

Steps to Create Friendship Rocks

1. Preparation


  • Wash and dry the rocks to eliminate dirt or debris.

  • Lay down paper or a plastic sheet to protect the work area.

2. Decorating the Rocks


Paint the Base:
Have each child paint the entire rock with a base color. Allow the paint to dry completely.


Add Designs:
Once the primer is dry, the children can use markers or different paint colors to add designs, patterns, and friendship messages to their rocks. Encourage them to draw symbols of friendship-like hearts or smiley faces or write words like “Friend” or “Love.”

3. Sealing the Rocks


  • After the paint and markers have dried, apply a coat of Mod Podge or clear sealant to protect the designs and make the rocks weatherproof. Allow them to dry completely.

4. Sharing and Displaying


  • The children can exchange rocks with their friends or place them in a unique friendship garden at school.

Friendship rocks are a simple yet powerful way for preschoolers to celebrate and cherish friendships.

6. Collaborative Collage

Creating a collaborative collage is an excellent way for preschoolers to work together and celebrate Friendship Day. This group activity emphasizes teamwork and creativity, resulting in a beautiful piece of art that represents their collective effort.

Materials Needed


  • Large poster board or canvas

  • Magazines, colored paper, and fabric scraps

  • Scissors

  • Glue sticks

  • Markers and crayons

Steps to Create a Collaborative Collage

1. Preparation


  • Set up a large work area with all the materials spread out for easy access.

  • Provide each child with a pair of safety scissors and a glue stick.

2. Creating the Collage


Theme Selection:
Discuss and agree on a theme for the collage, such as “Friendship,” “Nature,” or “Our Class.”


Collecting Materials:
Have the children cut out pictures, shapes, and patterns from magazines and colored paper that fit the chosen theme.


Assembling the Collage:
Encourage the children to work together to glue their cut-outs onto the poster board, overlapping and arranging them to create a cohesive and colorful design. They can also draw and add personal touches with markers and crayons.

3. Displaying the Collage


  • Once the collage is complete, display it prominently in the classroom or a common area. This is a visual reminder of the power of collaboration and friendship.

friendship crafts for preschool

Benefits of a Collaborative Collage


Teamwork:
Working together on a common project fosters a sense of teamwork and community.


Creativity:
Children express their creativity through different materials and techniques.


Communication:
The activity encourages communication and idea-sharing among the children.
A collaborative collage is a fantastic way to celebrate Friendship Day, highlighting the beauty of working together to create something special.

7. Buddy Puppets

Creating buddy puppets is an interactive craft that allows preschoolers to explore their creativity and express their friendships through imaginative play. These puppets can be used for storytelling and role-playing, making them a versatile addition to Friendship Day activities.

Materials Needed


  • Paper bags or socks

  • Felt, fabric scraps, and construction paper

  • Glue sticks

  • Markers and crayons

  • Googly eyes

  • Yarn (for hair)

  • Safety scissors

Steps to Create Buddy Puppets

1. Preparation


  • Lay out all the materials on a table for easy access.

  • Provide each child with a paper bag or sock to use as the base of their puppet.

2. Decorating the Puppets


Face and Features:
Have the children draw faces on the paper bags or socks using markers and crayons. They can glue on googly eyes, felt pieces for noses and mouths, and yarn for hair.


Clothing and Accessories:
Encourage the children to use fabric scraps and construction paper to create clothes and accessories for their puppets. They can cut out and glue these pieces to personalize their puppets.

3. Using the Puppets


  • Once the puppets are complete, the children can use them to put on puppet shows, reenact stories, or create their friendship tales. This activity encourages imaginative play and social interaction.

Benefits of Buddy Puppets


Creativity:
Designing and decorating puppets allows children to express creativity.


Fine Motor Skills:
Cutting, gluing, and assembling the puppets help develop fine motor skills.


Imaginative Play:
Using the puppets for storytelling fosters imagination and social skills.
Creating buddy puppets is a fun and engaging way to celebrate Friendship Day, allowing preschoolers to explore their friendships through creative play.

8. Friendship Crowns

Creating friendship crowns is a delightful way for preschoolers to celebrate their friendships. These crowns are easy to make and fun to wear, allowing children to feel like royalty while honoring their friends.

Materials Needed


  • Construction paper or cardstock

  • Markers, crayons, or colored pencils

  • Stickers, glitter, and gems

  • Safety scissors

  • Glue sticks

  • Tape or stapler

Steps to Create Friendship Crowns

1. Preparation


  • Cut the construction paper or cardstock into strips long enough to fit around a child’s head. Each child will need two strips to form a complete crown.

  • Set out all the decorative materials.

2. Decorating the Crowns


Personalize the Crowns:
Have each child write their name and their friend’s name on the strips using markers or crayons.


Add Decorations:
Encourage the children to decorate their crowns with stickers, glitter, and gems. They can draw pictures or symbols that represent their friendship, making each crown unique.

3. Assembling the Crowns


  • Tape or staple the ends of the strips together to form a circle that fits comfortably on the child’s head.

4. Wearing the Crowns


  • Once the crowns are assembled, the children can wear them during a special Friendship Day ceremony or parade.

preschool crafts for friendship day

9. Best Friends Picture Frames

Making best friends picture frames is a heartfelt and creative activity that allows preschoolers to celebrate their friendships with a tangible keepsake. These frames can hold photos of friends and serve as a cherished memory.

Materials Needed


  • Plain wooden or cardboard frames

  • Paints and paintbrushes

  • Stickers, beads, and gems

  • Glue sticks

  • Markers

Steps to Create Best Friends Picture Frames

1. Preparation


  • Provide each child with a plain frame and set out all the decorative materials.

2. Decorating the Frames


Paint the Frames:
Have the children paint their frames in their favorite colors. Allow the paint to dry completely.


Add Decorations:
Encourage the children to decorate their frames with stickers, beads, and gems. Using markers, they can write friendship messages or their friend’s name on the frame.

3. Inserting Photos


  • Once the frames are decorated and dry, help the children insert photos of themselves with their friends.

4. Sharing and Displaying


  • The children can exchange frames with their friends or take them home to display in their rooms.

Making best friends picture frames is a beautiful way for preschoolers to celebrate Friendship Day, creating a keepsake they can treasure.

10. Friendship Chain

Creating a friendship chain is a collaborative and symbolic craft representing friendship bonds. This simple yet meaningful activity involves making a paper chain, with each link representing a friend.

Materials Needed


  • Colorful construction paper

  • Safety scissors

  • Glue sticks or tape

  • Markers or crayons

Steps to Create a Friendship Chain

1. Preparation


  • Cut the construction paper into strips approximately 1 inch wide and 6 inches long.

2. Decorating the Strips


Write Names:
Have each child write their name and friend’s names on the strips using markers or crayons.


Add Decorations:
Encourage the children to decorate the strips with drawings, stickers, or patterns that represent their friendships.

3. Assembling the Chain


  • Form the first strip into a loop and secure it with glue or tape.

  • Thread the next strip through the first loop and secure it, creating a chain. Continue adding links until all the strips are connected.

4. Displaying the Chain


  • Hang the finished friendship chain in the classroom or a common area to symbolize the children’s connections and unity.

Benefits of a Friendship Chain


Collaboration:
Working together to create the chain fosters teamwork and a sense of community.


Symbolism:
The chain represents the strength and continuity of friendships.
Creating a friendship chain is a meaningful and enjoyable way to celebrate Friendship Day. It highlights the importance of each child’s role in their community.

Conclusion

Celebrating Friendship Day with these fun and creative preschool crafts is a fantastic way to help children appreciate and understand the value of their friendships. From heartfelt handprints and friendship bracelets to buddy bookmarks and crowns, each craft offers a unique way for kids to express their love and appreciation for their friends. These activities foster creativity, strengthen social bonds, and develop essential skills.

Ready to get started with our services? Call Young Scholars Academy at (719) 522-9099 or visit our Contact Us page to learn more about our programs and how we can help your child grow and thrive!

Filed Under: Activities, Art Projects, Events

Scissor Skills at Home

January 7, 2021 by Young Scholars Academy Leave a Comment

If you haven’t already, go ahead and hand over some kid scissors to your preschooler! This is such a crucial fine motor skill your kiddo needs before heading off to Kindergarten. This fine motor is a skill that gets better with lots of practice. Do not be afraid of handing your child a cutting tool, here are some tips and scissor practice skills that you can do at home with your preschooler.

If you did not know, there are a few types of kid scissors out there. A quick amazon search will pull up a few different kinds. In our classroom we use the ones with the rounded tip. As your preschooler gets older and more advanced with their scissor skills they can move up to the ones with a point. Also, pick up some construction paper or copy paper to have on hand so they have paper to practice with. You could also use bills that need to be shredded or the annoying postcard flyers that you get sent in the mail for them to practice their cutting. Two birds, one stone?

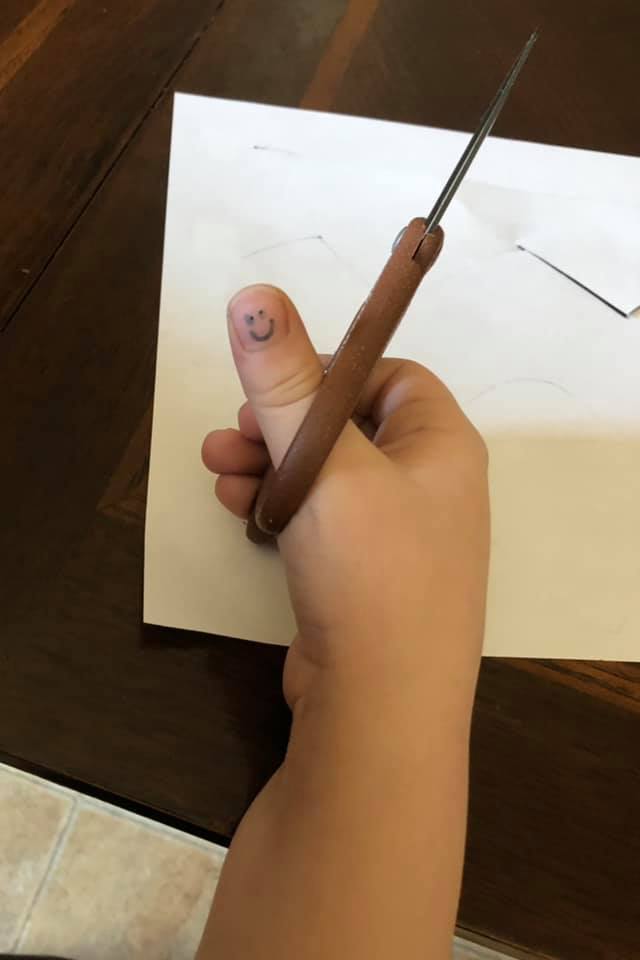
First, talk with your child about correct scissor safety. Introduce them to the tool and make sure they know how to properly hold and carry scissors while walking. Go over things they are allowed to cut and things they are not allowed to cut, you know like hair, pet fur, doll hair, carpet, home decorations, anything besides what you set the guidelines for. Be specific, sometimes kids try to find that loophole-haha! Show your child the correct way they should hold scissors in the cutting position. Have them try it out and just practice the basic movement. Make sure they are holding their wrist up, flipping their wrist inward is something we see at times, just help remind your child that they hold their thumb up and not down.

Once you are ready to practice with your child, hand them some paper. Give them about a half sheet to start, that way it is easier for them to hold in one handed. Pull out your baking sheet and have them practice cutting the paper over the tray, this makes for easy clean-up. Just let them practice cutting whatever they want at first, while you are supervising. Correct their hold if you see them try to flip their wrist. Let them practice until they lose interest. Keep practicing further until they get the hang of the cutting motion.

Once they feel comfortable with cutting, you can make easy scissor practice activities at home. One idea is putting a sticker on a piece of paper and drawing different types of lines that connect to the sticker. Your child will cut the (wavy, straight, curvy, loopy, zig-zag) line to try to get to the sticker. I will include a picture for reference. Another activity is to have your child cut out shapes-start by tracing the shape out on paper for them to cut out on the line. As they progress just tell them the shape to cut out on their own to make it a bit harder. You could also have your kiddo just out “snowflakes”. Show them how to fold their paper, this will also make cutting a bit more challenging. Depending on their ability, have them make triangle cuts, or just straight lines on the folded crease. When they open up their paper they will have their snowflakes!

If your child is struggling with using scissors, they do make spring lever action scissors that help make it easier for kids to cut. This could be an option at first to help them practice, then switch back to the regular form when you think they are ready. If your child is having a hard time keeping their wrist turned correctly, you can draw a smiley face on their thumb nail as a way to remind them that the smile stays up while you cut.
Allowing your child to safely have access and use scissors is a great independent skill to work on. Take the time to teach them and let them practice, kids really do love to just cut up paper!

Ms. Whitney
Lead Pre-Kindergarten Teacher
Curriculum Coordinator

Filed Under: Art Projects

CANVAS DRILL ART

July 28, 2020 by Young Scholars Academy Leave a Comment

Don’t go into this project thinking you’re going to come out clean, wear clothes you have no emotional attachment to at all. Your kids are going to have as much fun with this project as ours did, so let’s get messy!

Supplies:

  • Canvas (any size you want)
  • Acrylic paint (colors are up to you)
  • Drill & drill bit Scrap piece of wood (long enough to fit two ends of your canvas)
  • Two small screws

First,you’ll take your scrap piece of wood screw it into the wood frame edge of the canvas. Then in the middle you will make a hole. This is how the drill will spin the canvas and create a splatter effect later. For reference on what it should look like, look at this!

You will have to set up your area and keep an eye on the wind. We recommend a tarp or cut up garbage bag to attempt to keep paint off your driveway or sidewalk. (Notice the word attempt there!)

Once you do this, now it is really time to have some fun.

We let each of our kids pick whatever color they would like for their canvas. We also let them squeeze and open the bottles themselves. These kinds of movements are great for fine motor skills. It additionally requires patience and hard work as the easy thing to do is to just do it for them. Not the case here, we wanted the kids to do this project pretty much by themselves, well expect the drill of course

So once everyone had their turn, and anyone who wanted to go again could, it was time for the drill!

Using the premade hole, you did at the beginning, you’ll insert the drill into that hole again and spin away! In this instance we did not let the kids do it just because their clothes get dirty enough without acrylic paint. However, if you are going to do this at home, why not let them try? Just tell the in-laws the kids need clothes for Christmas…

Here is the final masterpiece!

Didn’t it turn out amazing?

After our project we talked with the kids about wind, force and what made the colors move. Of course, everyone had to try out the drill later and there definitely were some attempts at trying to touch the paint.

Overall it was a great art project and we can’t wait for you guys to try this at home!

Filed Under: Art Projects

3 Kids Project to Celebrate National Crafts Month

March 29, 2019 by Young Scholars Academy Leave a Comment

Now is the best time to encourage your child to channel their inner artist! Get the art materials and supplies ready because this March, we are celebrating National Crafts Month! National Crafts Month was created by the Craft and Hobby Association in 1994.

This celebration of crafts is designed to encourage everyone to find joy in crafting, learn new crafts and discover or revisit a hobby. It also supports the use of all kinds of mediums. From paints, fabrics, yarns, paper – you can have your child take their pick when it comes to materials.

Celebrate National Crafts Month with these projects your little one will surely love!

Rainbow Windsock Toilet Paper Roll Craft

This Rainbow Windsock Toilet Paper Roll Craft is an adorable craft perfect for rainy days. It can turn your child’s gloomy day into something fun and exciting!

Here are the materials you’ll need:

  • blue paint
  • toilet paper roll
  • scissors
  • white paper
  • black marker
  • string
  • tissue paper in different colors
  • hole puncher

How to do it?

  1. Start by painting the toilet paper roll in blue. You can have your child do this step with your guidance.
  2. Once the roll is painted, you can set it aside until the paint dries completely.
  3. In the meantime, you can make the clouds by drawing a cloud shape and cutting it out. Let your child draw eyes and a mouth to make it more fun.
  4. Then go back to your toilet paper roll and punch two holes on either side where you can insert the string for hanging.
  5. Push the yarn through the holes and tie it up.
  6. Get your cloud and glue it on the toilet paper roll.
  7. Then, cut the colored tissue paper into long strips and glue them around the toilet paper roll.

Once done, it is ready to be hung!

Paper flower crafts

Making paper flower crafts is perfect for kids of all ages. Not only is it a fun activity but it also helps develop their fine motor skills.

These are the materials you’ll need for this craft:

  • yellow paper
  • circle paper punch
  • scissors
  • colored paper
  • green paper straws
  • stick glue
  • clear or patterned tape

How to do it?

  1. Guide your child when it comes to punching a few circles out of yellow paper using the puncher.
  2. Cut strips of colored paper but make sure to pay attention to their size in relation to the yellow circles.
  3. Then, make a paper loop by putting together the ends of the strips with glue. Depending on the flower you are making, you may need to make quite a few.
  4. Have these loops glued on the side of the paper circle until it forms a flower.
  5. The final step is to glue the green paper straw at the center of the flower and secure it with tape.

3D Rainbow Paper Craft

Making rainbow crafts is another activity your little one will surely enjoy. Because rainbows are made of different colors, this craft can be a wonderful opportunity to teach your child about colors. Here are the materials you need to make a 3D Rainbow Paper Craft.

  • Construction paper in rainbow colors
  • scissors
  • cotton balls
  • duct tape

This craft is very easy to make.

  1. Cut 7 strips of paper, one strip of each color to make a true rainbow.
  2. Then, cut out two cloud shapes using your white construction paper.
  3. Arrange the strips according to the correct color order of the rainbow (red, orange, yellow, green, blue, indigo, violet, or the other way around) and glue one end on one cloud.
  4. Then, glue the other end on the second cloud.
  5. Use duct tape to secure both ends.
  6. Fold the strips of paper following the line of the duct tape so it’s easier to make an arch.
  7. Apply glue on the clouds and add cotton balls on both sides of the strips to hold the rainbow’s arched shape.

Once done with both clouds, your rainbow craft is complete!

There are plenty of fun and engaging crafts your kids can create this National Crafts Month! Feel free to explore some other crafts and use them as an exciting bonding activity with your kids!

Filed Under: Art Projects

  • 1
  • 2
  • Next Page »

CHECK AVAILABILITY

Photo of Best Childcare School

Young Scholars Academy
5815 Tutt Center Point
Colorado Springs, CO 80922
(719) 626-9650
Mon - Fri 6:00am - 6:00pm

DRIVING DIRECTIONS

Follow Us

Summer Camp Signup!
Programs
Review Us Online

Categories

  • Activities
  • After School
  • Art Projects
  • Calendar
  • Events
  • Family Tips
  • General Updates
  • Health & Wellness
  • Holidays
  • Newsletters
  • Pre-Kindergarten
  • Preschool
  • Programs & Curriculum
  • Email Login
  • Disclosures
  • Site Map
  • No Joke Childcare
  • Admin Login
  • Contact Us
  • Updates Simplified

5815 Tutt Center Point Colorado Springs, CO 80922, (719)522-9099

Copyright 2025 Young Scholars Academy All Rights Reserved.

Email Login| Site Map| No Joke Marketing For Childcare| Contact Us| Updates Simplified